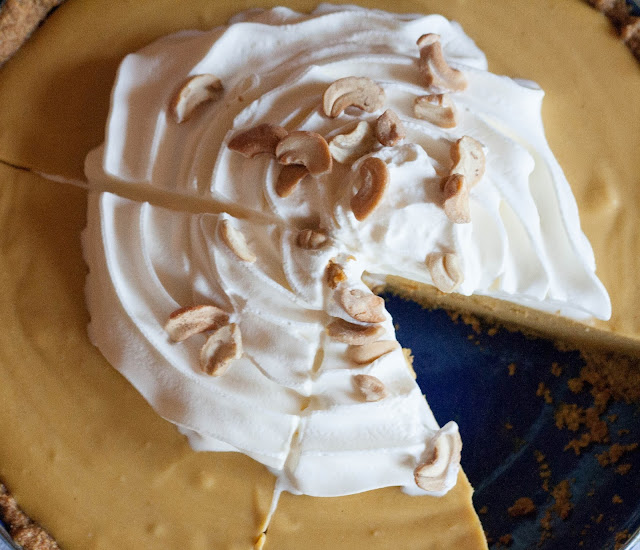
Pumpkin Butterscotch pie
Recipe by: GlutenFree
Ingredients: Makes one 9 inch pie
PIE CRUST:
2 1/3 cups gluten free all purpose flour blend of choice
1 tablespoon granulated sugar
½ tablespoon pumpkin pie spice
¼ teaspoon kosher salt
½ cup unsalted butter, cubed and chilled, or 7 tablespoons solid spectrum non hydrogenated shortening
5 tablespoon solid spectrum non hydrogenated shortening
¼ - 1/3 cup vey cold water
FILLING:
1 ½ cups milk or full fat canned coconut milk, divided
¼ cup brown sugar
¼ cup good quality pumpkin butter
1/3 cup granulated sugar
2 cups canned pure pumpkin puree ( organic preferred)
3 large eggs
2 tablespoons gluten free all purpose flour blend of choice
2 tablespoons dark rum, optional
2 teaspoons pure vanilla extract
Procedures:
To make the crust, place flour, sugar, pumpkin pie spice and salt in the bowl of a food processor and pulse until blended. Add cubed butter and shortening and pulse until mixture form uneven, coarse crumbs. While food processor is running, and cold water, a little at a time, just until mixture form into a smeary, ranged looking ball.
Turn dough out onto a sheet of plastic wrap and knead it just until it comes together. Divide dough in half, wrap in plastic and chill 2 hours or overnight.
Preheat oven to 350F. line a cookie sheet with parchment paper.
Roll half the chilled dough between 2 sheets of plastic wrap. Place in 9 inch or 10 inch pie pan and crimp edges. Chill crust 15 minutes. ( dough can be rolled out and refrigerated or frozen up to 4 days ahead. ) place pan on a cookie sheet and bake it in preheated oven 15 minutes. Cool crust before adding filling.
Roll remaining half of chilled dough about 1/8 inch thick. (keep dough chilled while cutting out cookies by refrigerating as needed. ) cut out 15 small leaves or decorate cookies. Place them on prepared cookie sheet and bake in preheated oven 15 to 18 minutes or until golden brown. Remove from oven and set aside to cool.
To make the filling, measure out milk, brown sugar and pumpkin butter in separate small bowls to have at the ready. Then place the granulated sugar in a small saucepan with tall sides and carefully melt it over medium low heat. As soon as it starts to liquefy, drag the dry sugar to the center using a fork let sugar turn brown( like an old copper penny) but watch it carefully so that it doesn’t burn. ( sugar browns quickly once it starts to melt, usually under a minute.) remove sugar from heat and immediately stir in ½ cup milk. It will bubble up and be very hot, so use a wooden spoon with a long handle. Stir in remaining 1 cup milk, brown sugar and pumpkin butter until smooth. If caramel hardens or forms clumps when you add other ingredients, put it back on medium low heat and stir until mixture melts, about 2 minutes. Remove from heat and let mixture cool until you can place your hand on the bottom of the pan.
Place pumpkin puree and eggs in a medium bowl and combine. Add flour blend, rum, pumpkin pie spice and vanilla and whisk to incorporate. Add caramel mixture and whisk to combine.
Carefully pour filling into cooled crust while it’s still on the cookie sheet, filling crust to the top of the pan. Pour carefully so crust doesn’t break.
Place pie ( on cookie sheet) in preheated oven and bake 15 minutes. Reduce oven temperature to 325F and bake 35 to 40 minutes or until center is set and crust is a dark golden brown.
Remove pie from oven and place on a rack to cool. Refrigerate overnight. Bring to room temperature and add cookie decoration before serving.
For EGG FREE PUMPKIN BUTTERSCOTH FILLING, omit 3 eggs. Mix 3 tablespoons cornstarch into ¼ cup cooled caramel liquid and blend well. Add the balance of caramel liquid, mixing well before adding to pumpkin puree in step 7. After baking let pie cool and refrigerate 2 hours so pi can film up. Serve chilled or a room temperature.
For SWEET POTATO BUTTERSCHOTCH PIE, substitute an equal amount of canned sweet potato puree for the pumpkin puree. End.
How to Make Pumpkin Butterscotch Pie
Allan
5:04 AM
Popular Posts

How to Make Greek Turkey Burger
2:36 AM

How to Make Pili Tarts
7:35 AM

Gabi in Philippine - Taro
4:42 AM

Healthy Vegetable Laing Recipe
3:27 AM
Recent Posts
3/recent/post-list
Recent in Sea Foods
3/Sea%20Food%20Recipe/post-list
Hot Recipe
3/random/post-list
Menu Footer Widget
Copyright ©
Cooking Signature All Right Reserved | Distributed By Invoshopoption.com


0 Comments